If we could establish dev environment in a Docker container, it is easy to share the environment. It’s easy to set up the environment on windows but if you want to have better performance, you need to use WSL2. I will explain how to prepare the environment in this article.
Let’s establish the environment together with me.
Setup WSL2 and ubuntu environment
You can basically follow the official page to prepare the WSL2 and ubuntu environment on Windows.

Installing Ubuntu with default version
The command needs to be executed in PowerShell with an admin right.
I executed the following command. This command will install the default version.
> wsl --install -d ubuntuInstallation succeeded.
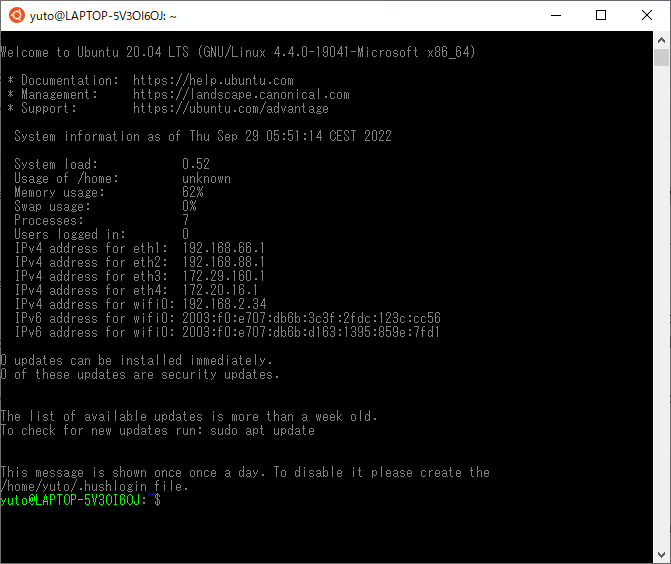
Change the version from WSL1 to WSL2
But if I check the version, Ubuntu uses WSL1.
> wsl -l -v
  NAME                   STATE           VERSION
* docker-desktop-data    Stopped         2
  Ubuntu                 Running         1
  docker-desktop         Stopped         2
I changed the version with the following command.
> wsl --set-version ubuntu 2
変換中です。この処理には数分かかることがあります...
WSL 2 との主な違いについては、https://aka.ms/wsl2 を参照してください
変換が完了しました。

> wsl -l -v
  NAME                   STATE           VERSION
* docker-desktop-data    Stopped         2
  Ubuntu                 Stopped         2
  docker-desktop         Stopped         2
Change the display name
Update completed but the name is Ubuntu without the version info. So, I changed it with the following steps.
- Press
windows key + R - Input
regeditand enter - Go to
\HKEY_CURRENT_USER\SOFTWARE\Microsoft\Windows\CurrentVersion\Lxss - Find an entry where
DistributionNameisUbuntu - Change the name to
Ubuntu 20.04 LTS
The name changed.
> wsl --list --verbose
  NAME                   STATE           VERSION
* docker-desktop-data    Stopped         2
  Ubuntu 20.04 LTS       Running         2
  docker-desktop         Stopped         2
Installing the same Ubuntu version
By the way, when I executed the following command
wsl --install -d Ubuntu-20.04The same version was installed correctly.
> wsl --list --verbose
  NAME                   STATE           VERSION
* docker-desktop-data    Stopped         2
  Ubuntu-20.04           Stopped         1
  Ubuntu 20.04 LTS       Stopped         2
  docker-desktop         Stopped         2
If you need two Ubuntu with the same version, you can install them with the following commands.
wsl --install -d Ubuntu
wsl --install -d Ubuntu-20.04
The default version was 20.04 when I executed it but it could change with this option --set-default-version <Version>. But I didn’t try it.
Remove one of the distribution
There are two Ubuntu 20.04. I need only one. So, I tried to remove it but…
> wsl -l -v
  NAME                   STATE           VERSION
* docker-desktop-data    Stopped         2
  Ubuntu-20.04           Stopped         2
  Ubuntu 20.04 LTS       Stopped         2 <- this is what I want to remove
  docker-desktop         Stopped         2

> wsl --unregister Ubuntu
Unregistering...
There is no distribution with the supplied name.
> wsl --unregister "Ubuntu 20.04 LTS"
Unregistering...
There is no distribution with the supplied name.
I changed the name from the registry. When I changed the name back to the original Ubuntu from Ubuntu 20.04 LTS and executed the command again
> wsl --unregister Ubuntu
Unregistering...
>
I was removed correctly.
Hmm… It’s strange.
Install Docker
Docker has already been installed on my machine so I updated the version to Docker Desktop 4.12.0.
I changed the settings as shown below.
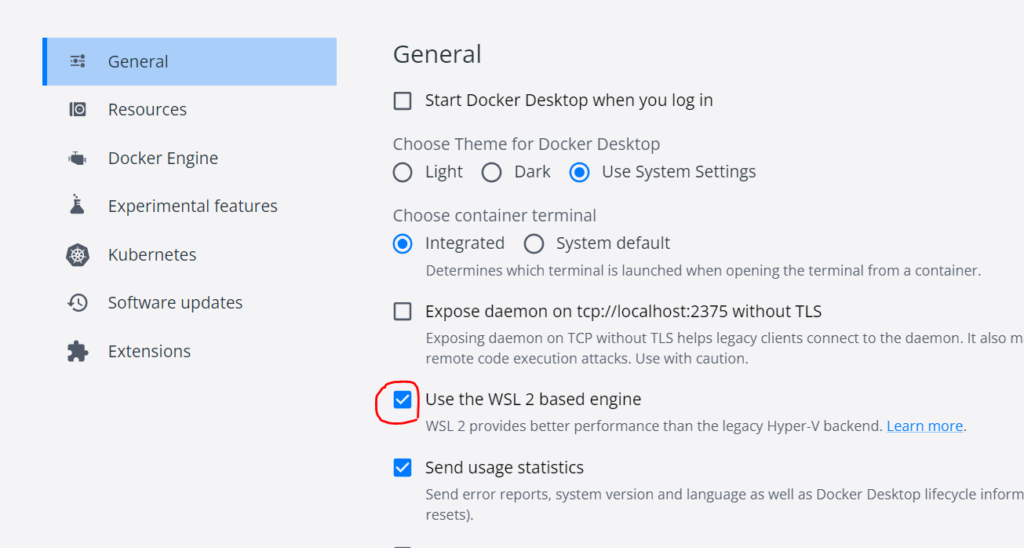
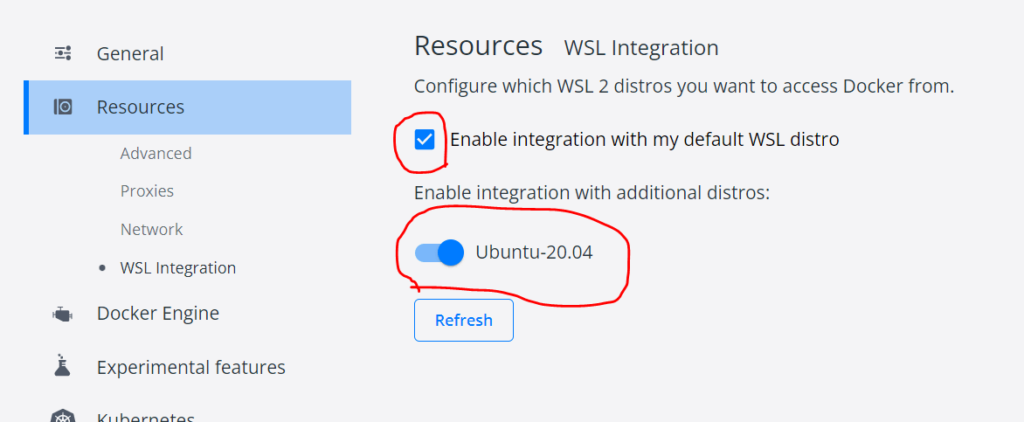
But it didn’t work as expected. docker command isn’t recognized in Ubuntu system even after reboot.
After I uninstalled and re-install it, it worked. It is actually not necessary to check Ubuntu-20.04
docker command is recognized in Ubuntu.
~/development/play-with-go$ docker -v
Docker version 20.10.17, build 100c701
Open VSCode from Ubuntu
I created new directories in Ubuntu system.
$ pwd
/home/yuto
$ mkdir development
$ cd development
$ mkdir play-with-go
$ cd play-with-go
$ pwd
/home/yuto/development/play-with-go
If you execute “code .” command, it opens the current directory in VSCode.
If WSL extension is installed, “code .” command will install VS Code server.
~/development/play-with-go$ code .
Installing VS Code Server for x64 (e7f30e38c5a4efafeec8ad52861eb772a9ee4dfb)
Downloading: 100%
Unpacking: 100%
Unpacked 2424 files and folders to /home/yuto/.vscode-server/bin/e7f30e38c5a4efafeec8ad52861eb772a9ee4dfb.
Install extension
Install Dev Containers extensions if it has not been installed.
Create docker container environment
After you install Dev Containers extensions, this green button appears on the left bottom.

Click the button and select Reopen in Container.
Another way to do that is to press F1 key to open the Command Palette and select Reopen in Container.

You need to select what you want. I established Go lang development environment.
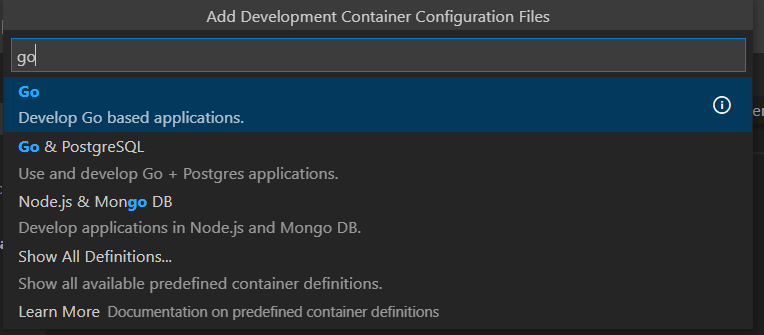
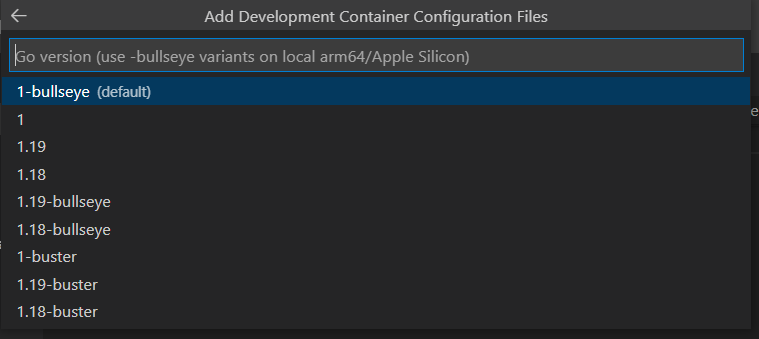
You can choose the docker image version. If you don’t know about it, default is ok.
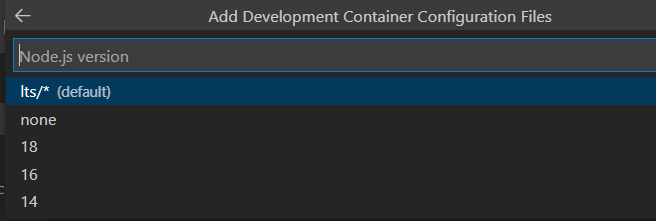
I don’t need Node.js. I chose none
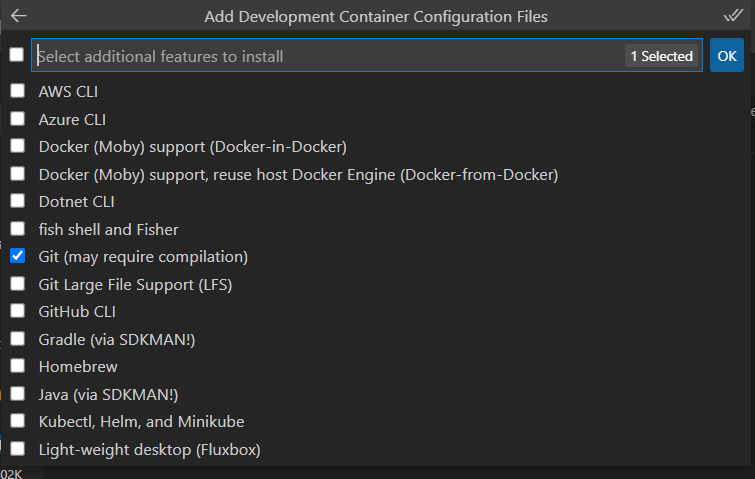
If you need additional features, you can check them here.
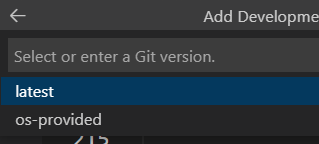
Git version needs to be selected.
Once the configuration step is complete, it starts creating the environment. It takes minutes.
When it’s ready, you can do what you want on VSCode.
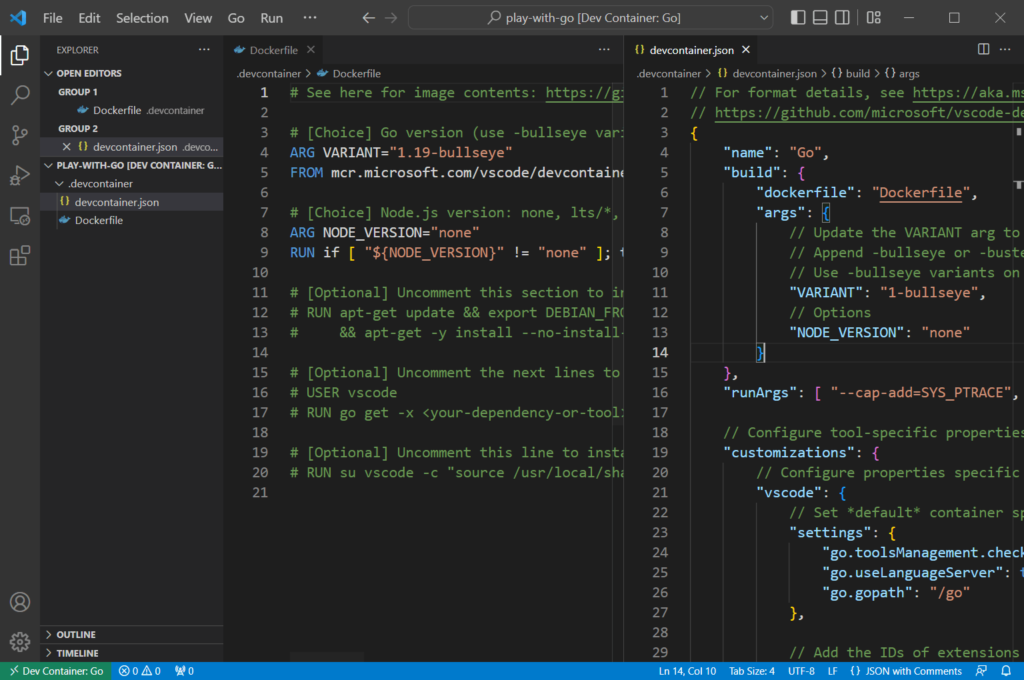
Dockerfile and devcontainer.json are generated automatically. Next time it starts, VSCode loads devcontainer.json for the settings. Dockerfile is used when the container is rebuilt.
You can now whatever you want without making your local system messy.



Comments